In this article, you will learn a few basic steps how to handle Star Micronics TSP 654II printer models (80 mm paper size and via LAN cable and router with WiFi)
We will show you how to insert paper correctly in printers, how to enable printing or find out the IP address of the printer, which we need to know for our internal system to communicate correctly with Storyous POS, And you will learn how to set up the printer when changing router and IP address, or after reset.

Inserting a paper roll correctly
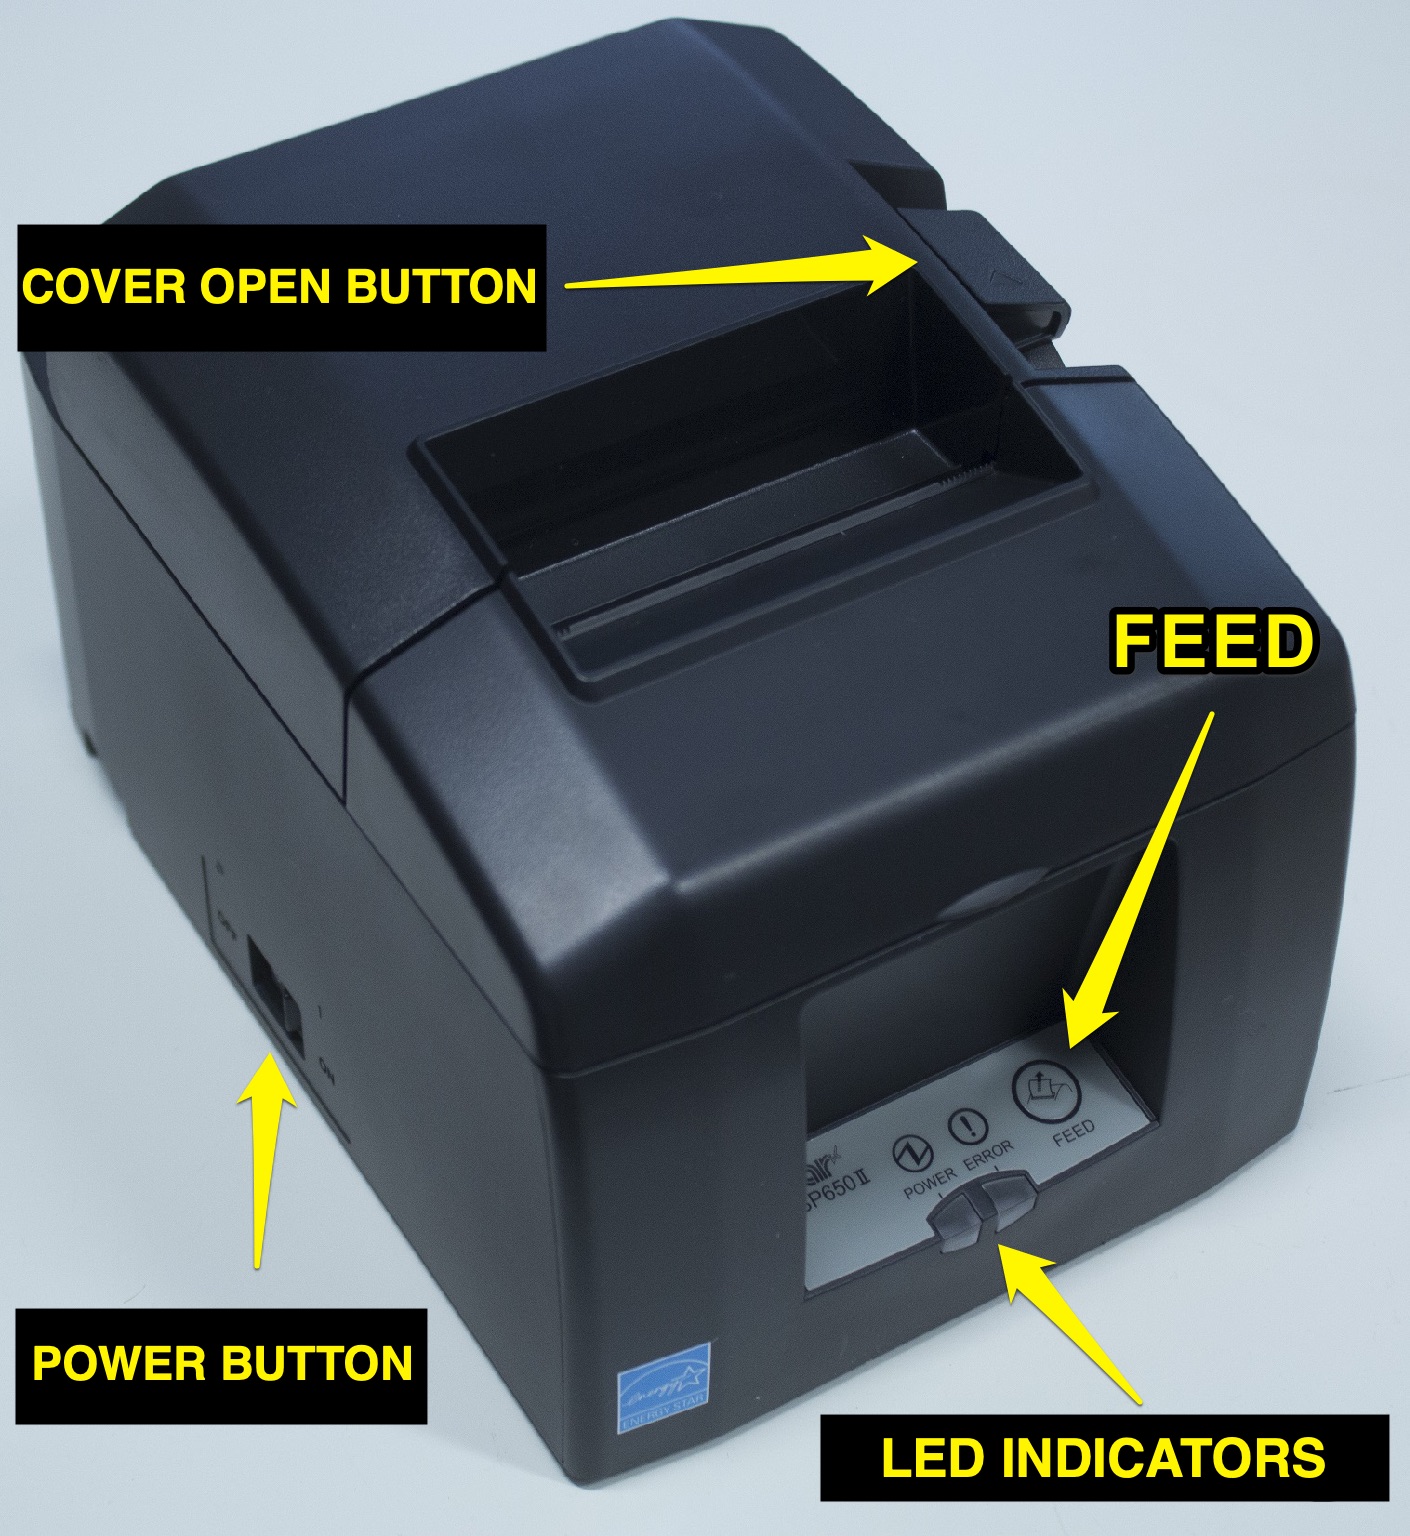
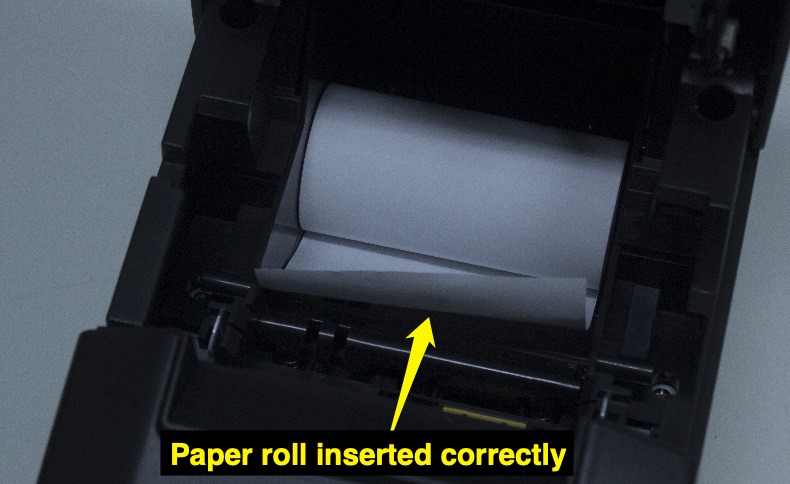
We recommend you to order paper rolls via Storyous, we are offering high quality thermal paper made in Germany. Open the cover of the printer by pressing the button on the right side of the top cover of the device by pulling it up (COVER OPEN BUTTON), and insert the paper roll into the inside of the printer so that the roll of paper unwinds upward as shown.

Self-test
Self-test is a note with data about your device. To print it, proceed as follows:
1. Make sure your printer is plugged in. Turn off the printer.
2. While the printer is off, press and hold the FEED button (on the front of the device).
3. Hold down the button and turn on the printer at the same time, after turning it on you need to hold the button for about 5 seconds, then you can release it. One shorter and after a while the second longer paper with technical data - self-test - will then come out of your printer.
Printer reset
The printer needs to be reset when changing the router or f.e. in the event of a power failure and blown fuses. After a reset, the printer must be set up in its software interface.
Process:
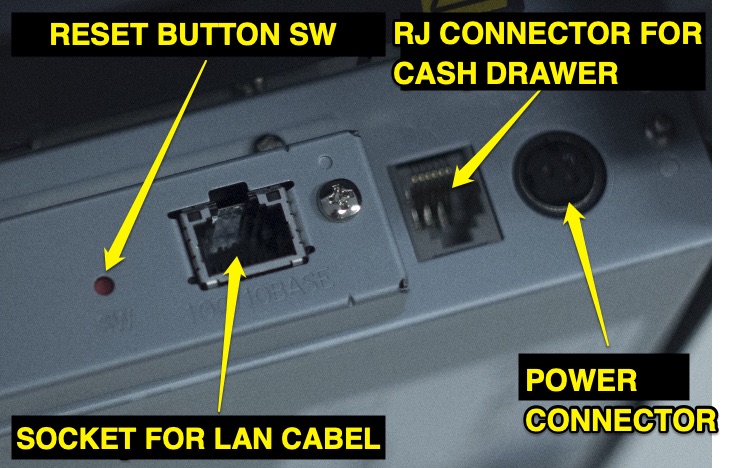
The printer must be plugged in and turned on. On the back to the left of the LAN cable you will find a small red button labeled SW - to press it you will need a sharper object, such as a pen. Press and hold the button - after about two seconds the LEDs on the LAN cable will flash. When this happens, release the button and quickly press it once more. Then the lights go out and a reset occurs - the printer's internal mechanism twitches. The lights on the front will flash quickly and then only green will light up, so you will know that the reset is complete.

If the reset fails repeatedly, unplug the printer adapter for 10-15 minutes, allow the printer to rest for a while, and try resetting later.
Star LAN printer settings for printing
1. Make sure you are connected on your tablet to the same WiFi network sent by the router connected to the printer. Print an information self-test ticket from the printer as instructed above, and then leave the printer turned on. The last three entries from the second paper under the text Current IP Parameter Status are important for the following procedure.
2. On your tablet, open the Google Chrome web browser and type the IP address from the self-test (in the format of four numbers separated by dots) in the address bar where the page addresses are written. You will be taken to the interface of your printer.
3. You need to set the device for stable printing in the printer's web interface. You will see a menu on the left, first select the Login tab under the System Access category. Log in with the login: "root" and password: "public".
4. The menu on the left will give you more options after logging in to the interface. We will only work with bookmarks under the Network Configuration category. First select IP Parameters, check the Static option here and overwrite the last three data from the self-test in the three boxes. Confirm the new setting by pressing the Submit button.
5.After changing the IP address to static and entering its parameters, open the System Configuration tab and change the second value in the list # 9100 Multi Session to ENABLE. Then press the Submit button to save the settings again.
6. The last step in the printer interface is configuration printing. On the Save tab, select the Save - Configuration printing - Restart device option (the longer line) and click the Execute button. The device prints a ticket with the new printer settings - that in itself is not important, but printing it is a sign that everything is fine.
If you change the router or reset the printer (in both cases the IP address of the printer will change), you need to report the new IP address to us to assign it to your device, otherwise the printer will not work properly!
Diagnostics
There are two lights on the front of the printer - POWER (green) and ERROR (red).
If only the red light is blinking, the printer is out of paper.
If both lights flash slowly at the same time, there is a problem communicating with the router. In this case, the LAN cable is probably inserted incorrectly or defective, so try disconnecting it and plugging it in properly or replacing it.
If both lights are blinking quickly at the same time, the printer has lost its IP address. Please try turning the router off and on again after a while, or plug the printer's LAN cable into another socket on the router and then reset the printer. If all zeros are printed on the self-test, you need to contact your network technician.