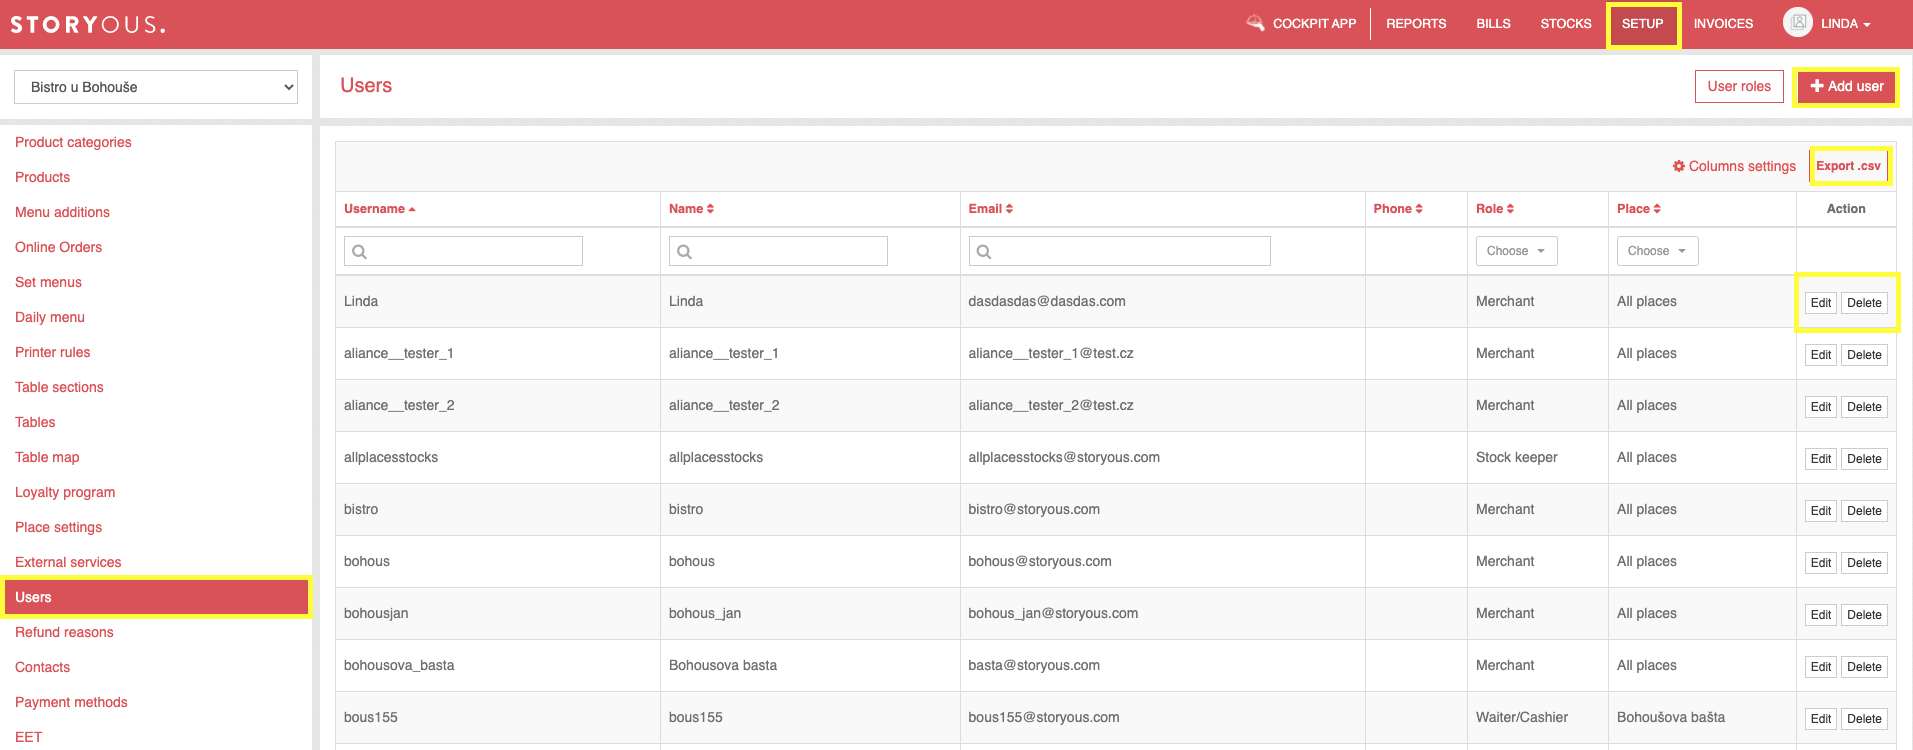
You can find user account settings in the Setup section and in the Users tab. Here you create and manage user accesses in your company, under which you and employees will then log in to the Storyous POS application on your tablet and to the Storyous web administration. You can create and edit users as the owner or place manager (you can find out more about the rights of all roles in our system below).
Before logging in for the first time, you already have one user pre-configured in the administration, with which you can log in at login.storyous.com. You will find the login name and password in the welcome email. You can then change both.
Each user can manage their account settings in the My Profile section.
In the Users section you will find a list of all user accounts in your company, the option to add a new user and the option to export the list to a .csv file. As the owner, you can edit or delete any account in the administration.
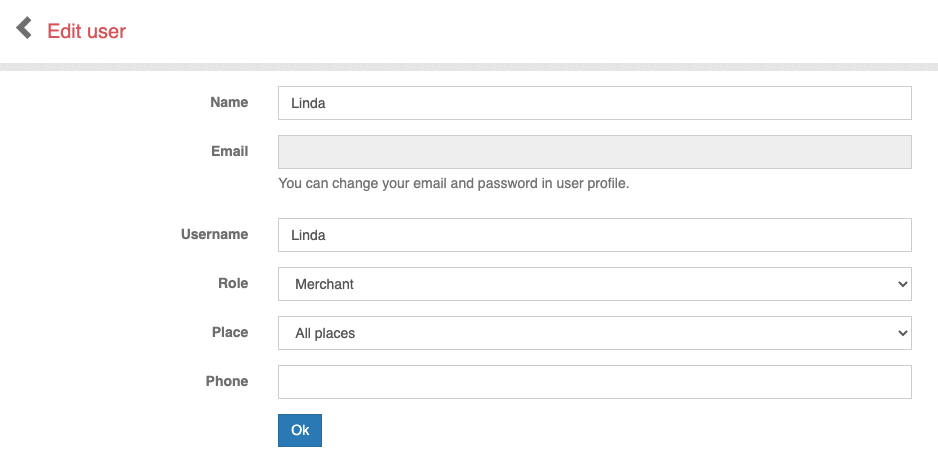
Adding and editing users
In this window you edit or re-enter user data. When creating a new user, it is mandatory to enter the name, username, password and email (it does not have to be an existing email, but it must be in the format x@y.z) and also select the role and possibly the place of business in which you want to create the user. Phone number is not required. You can edit all data for user accounts except for the email, for which you need to enter the current password.
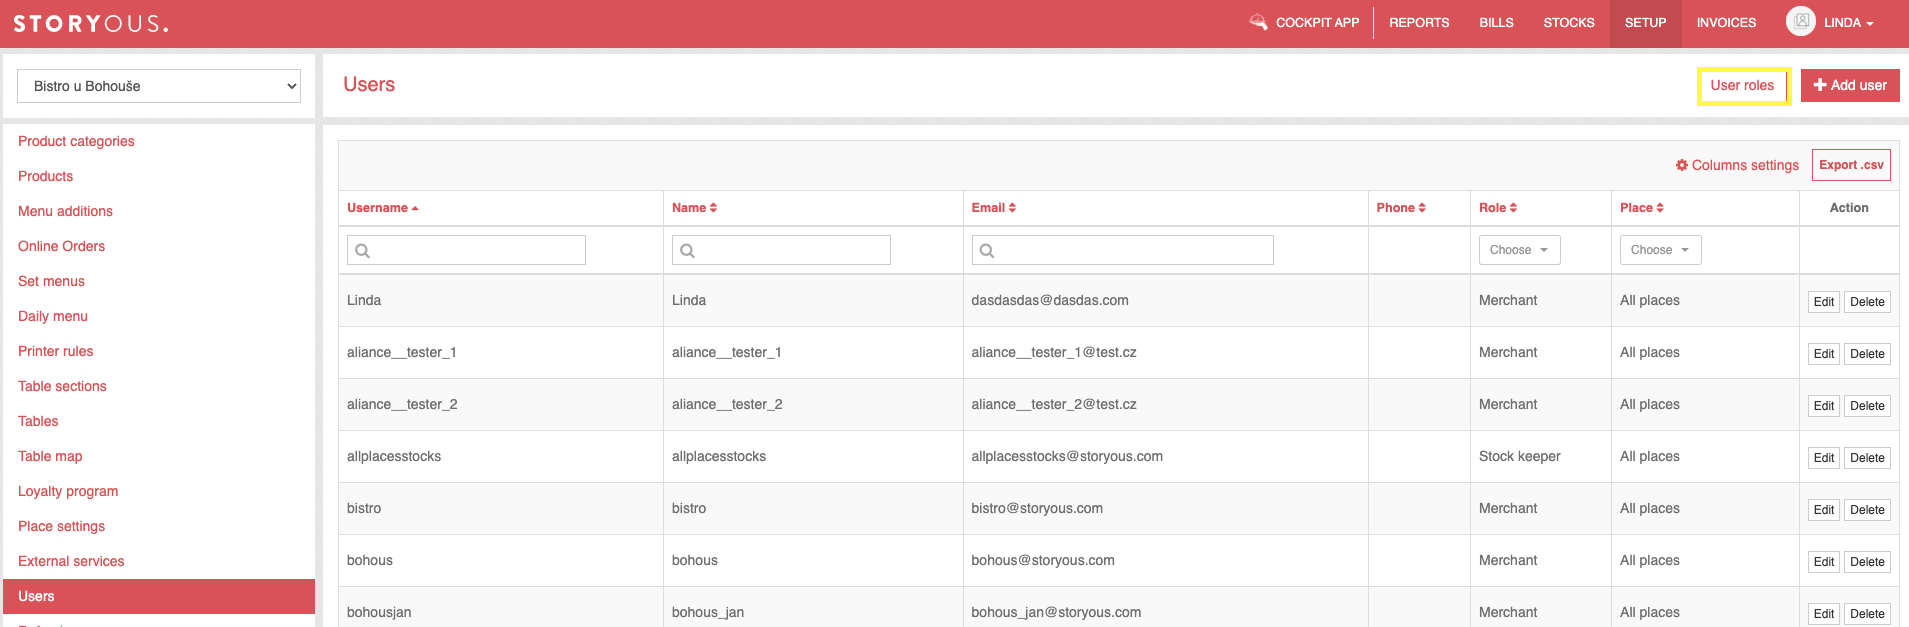
Creating your own user role
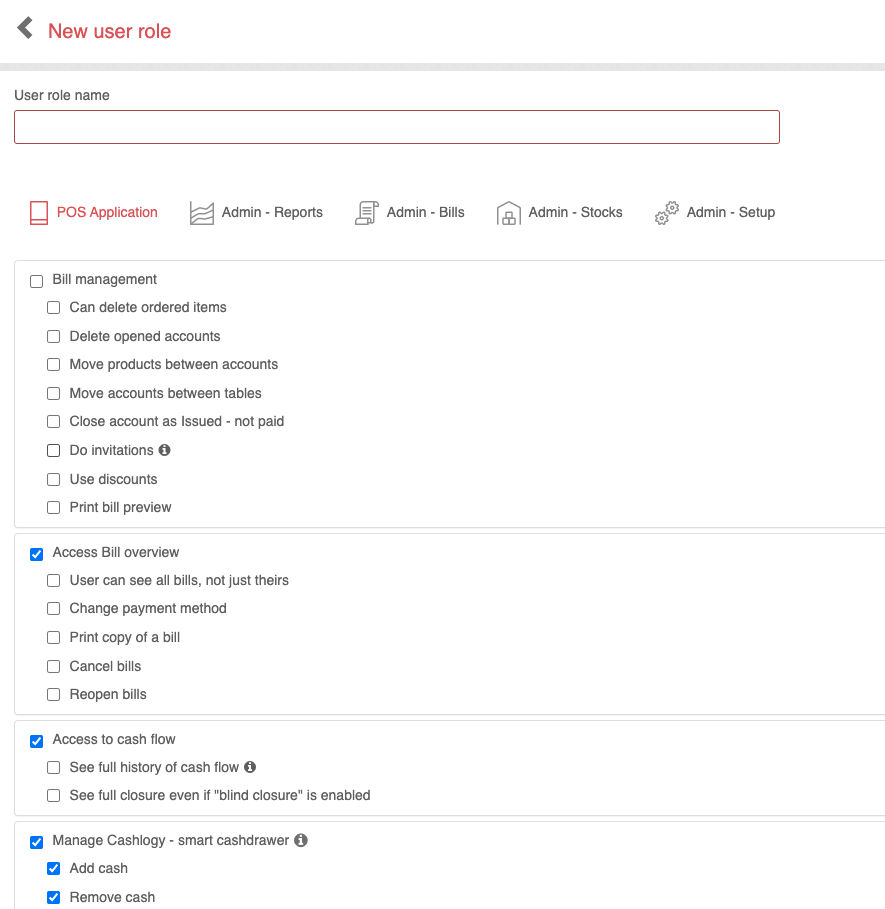
If the preset user roles with preset functions don't meet your requirements, you can create your own user role by clicking on User roles button and then New user role. You can now create a completely new user role with selecting your own rights and accesses.
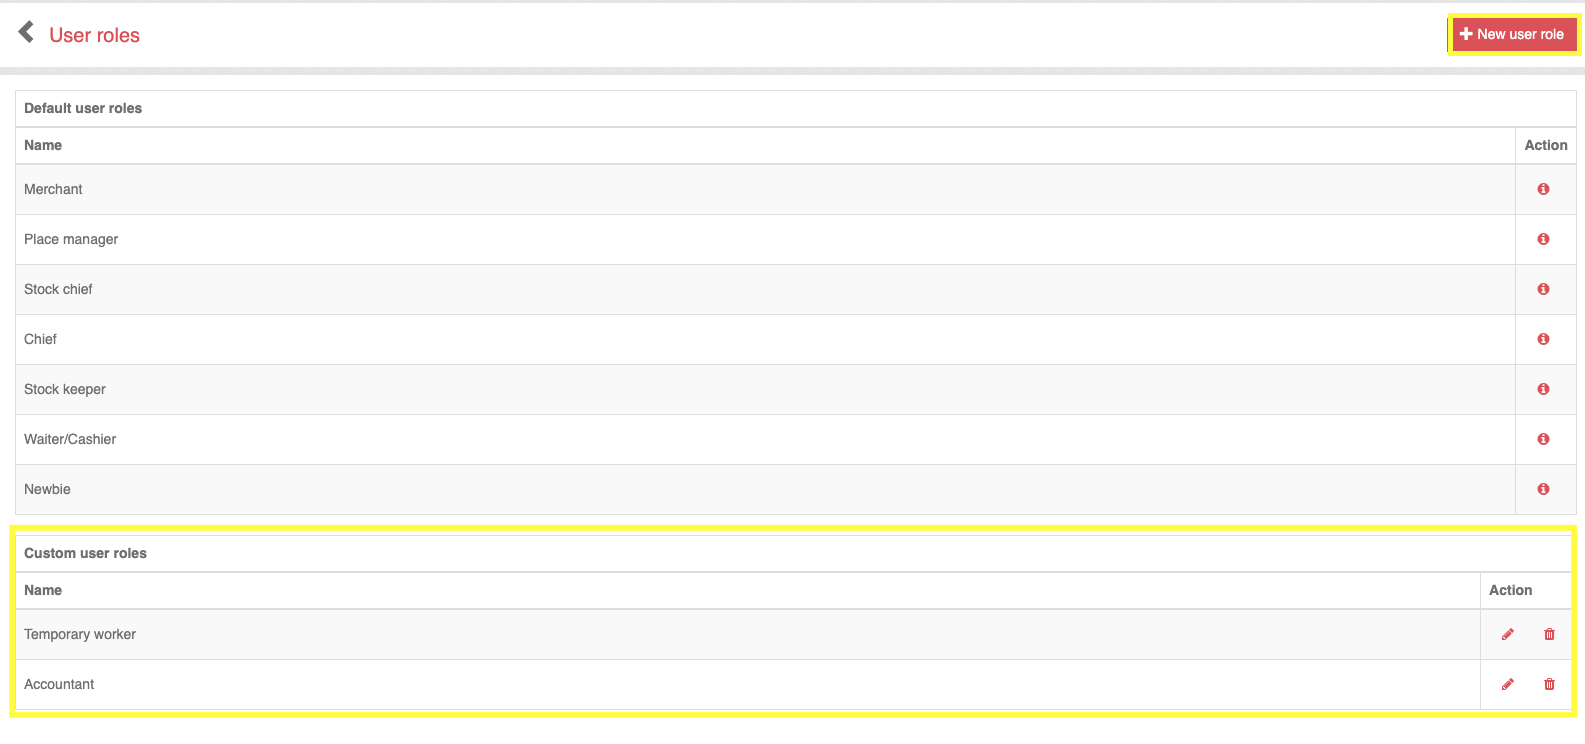
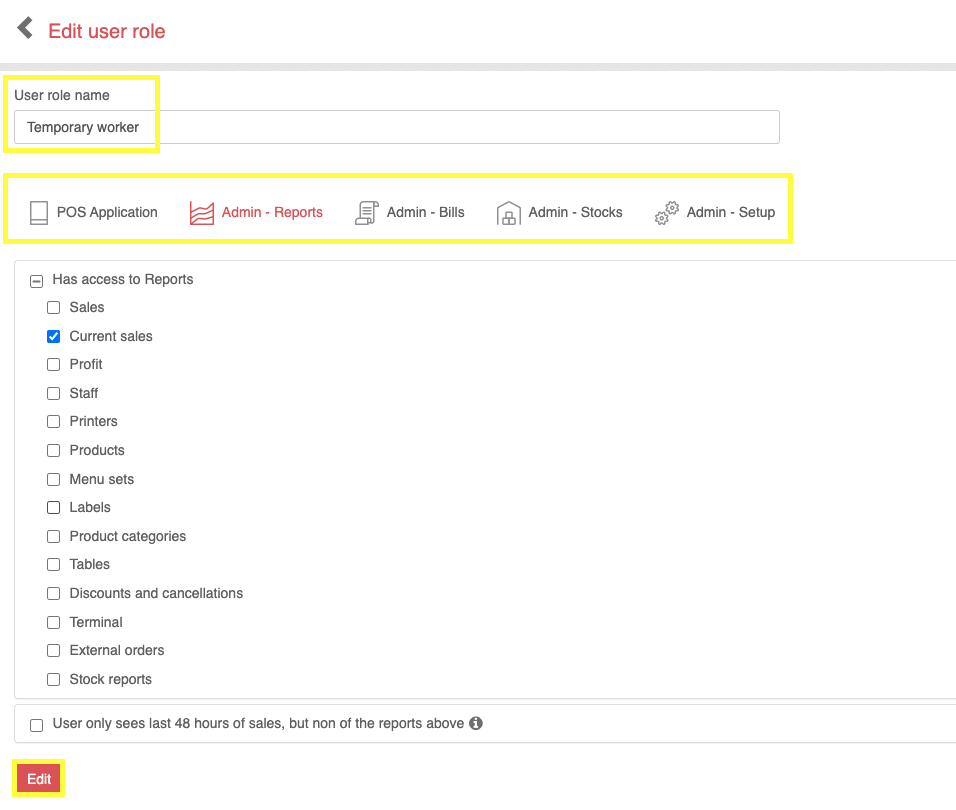
You can pick a name for the role according to your needs. You will see the individual functions and accesses for both the POS application and the web administration and its particular sections. You will allow access to the section for the newly created user role by clicking on check box. You can select accesses and rights for all sections (POS application, Admin - Reports, Admin - Bills, Admin - Stocks, Admin - Setup). Don't forget to save it by clicking on Save button. This role can be modified later.
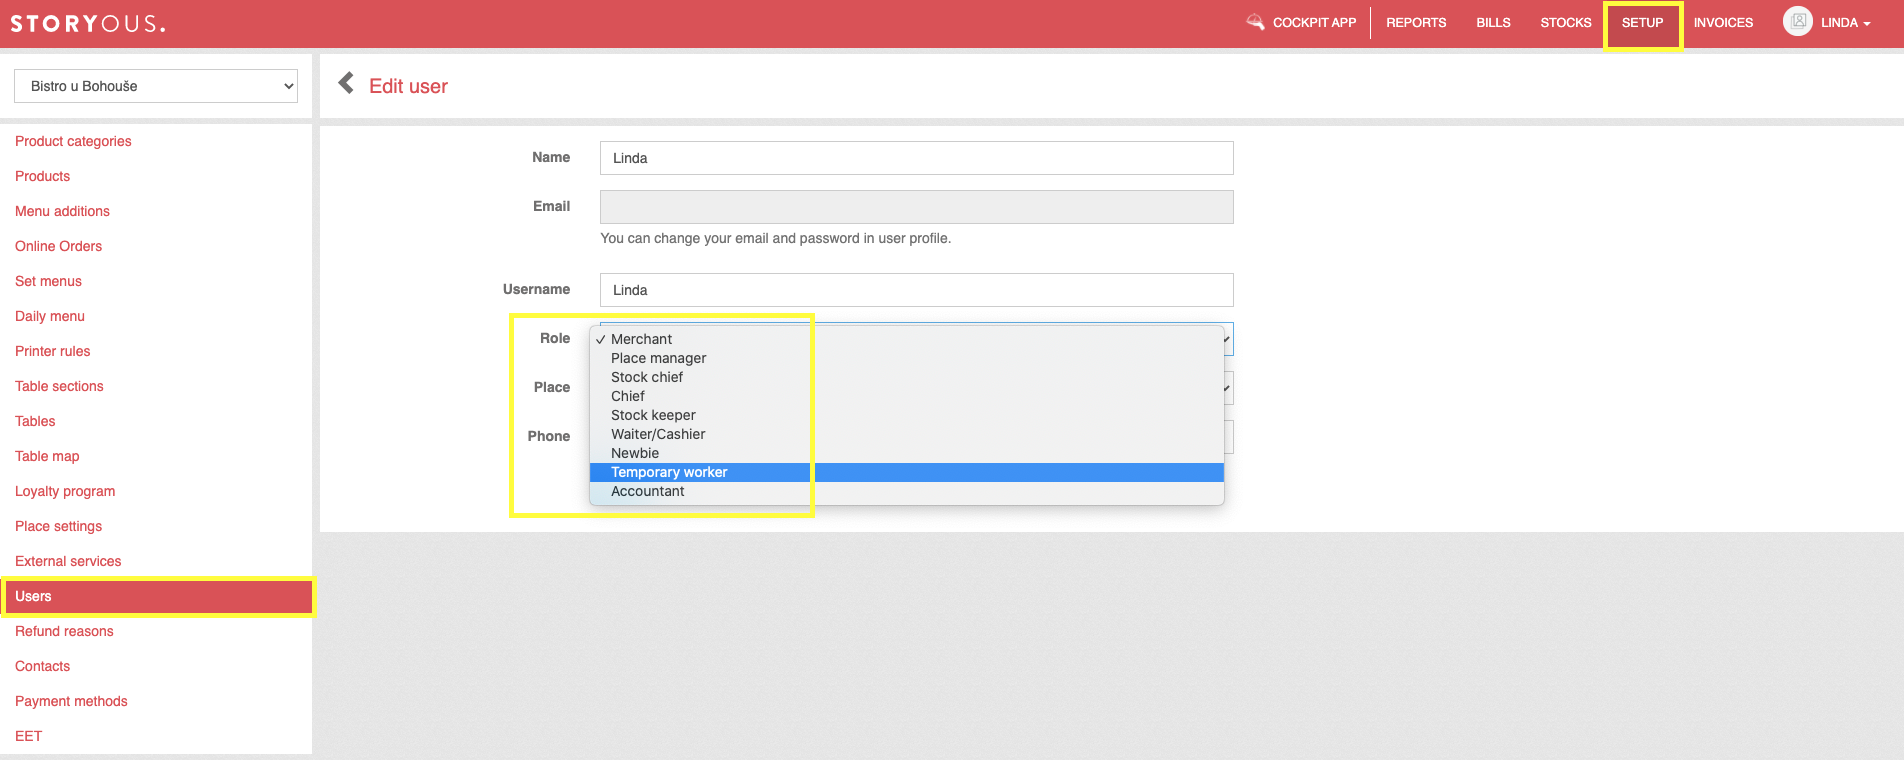
At Users tab, open the user detail by clicking on Edit button and selecting the newly created user role at Roles field.
Using the Copy permissions to the role button, you can easily and quickly create a new role with the same rights, plus add/remove other as needed, without having to check the same boxes all over again.
After clicking on the button, a new page with copied permissions will open. You can now select/remove additional rights and accesses and set a new user role name.
The role change will be processed after logging in and logging out in the StoryousPOS application. It is necessary to log out and log in in the web administration as well.
Only a user with an owner role can create, edit and delete new user roles. Already preset user roles cannot be edited or deleted.
If you manage more than one businesses in your web administration and set certain functions for one user, the role will be automatically set for the same user at the other places as well.
It is not possible to set more roles for one user across more places. Therefore, if one user is supposed to have a role of the waiter at one place, but a role of the place manager in the other one, we recommend having more users created.
Example: Adam Novák (user name adam_novak) will work as a waiter at Restaurace U Nováků, but U Nováků - buffet (both companies are run under one administration) he will work as a place manager. We will create a user role "operational" and choose the functions that the user with this role will be able to perform. We then assign the role to the user adam_novak in the user's detail. But now adam_novak will have the same access and rights to both the restaurant and the buffet. In the field "Company" we select only "U Nováků - buffet" and create a new user adam_cisnik, where in the user detail we select the role "Waiter" and in the field "Company" we select only "Restaurant U Nováků.